介绍
Moralis 是一个web3开发平台,为区块链项目提供后端即服务。
这是在 Ethereum、BSC、Polygon、Solana 和 Elrond 区块链上构建和部署去中心化应用程序 (dApp) 的最快方式。
Moralis 服务器及其软件开发工具包 (SDK) 无需从头开始构建您的 dApps 架构,而是为您提供后端帮助,让您可以轻松地从区块链实时交互和查询不可替代代币 (NFT) 数据!
我们将构建什么 - NFT Explorer
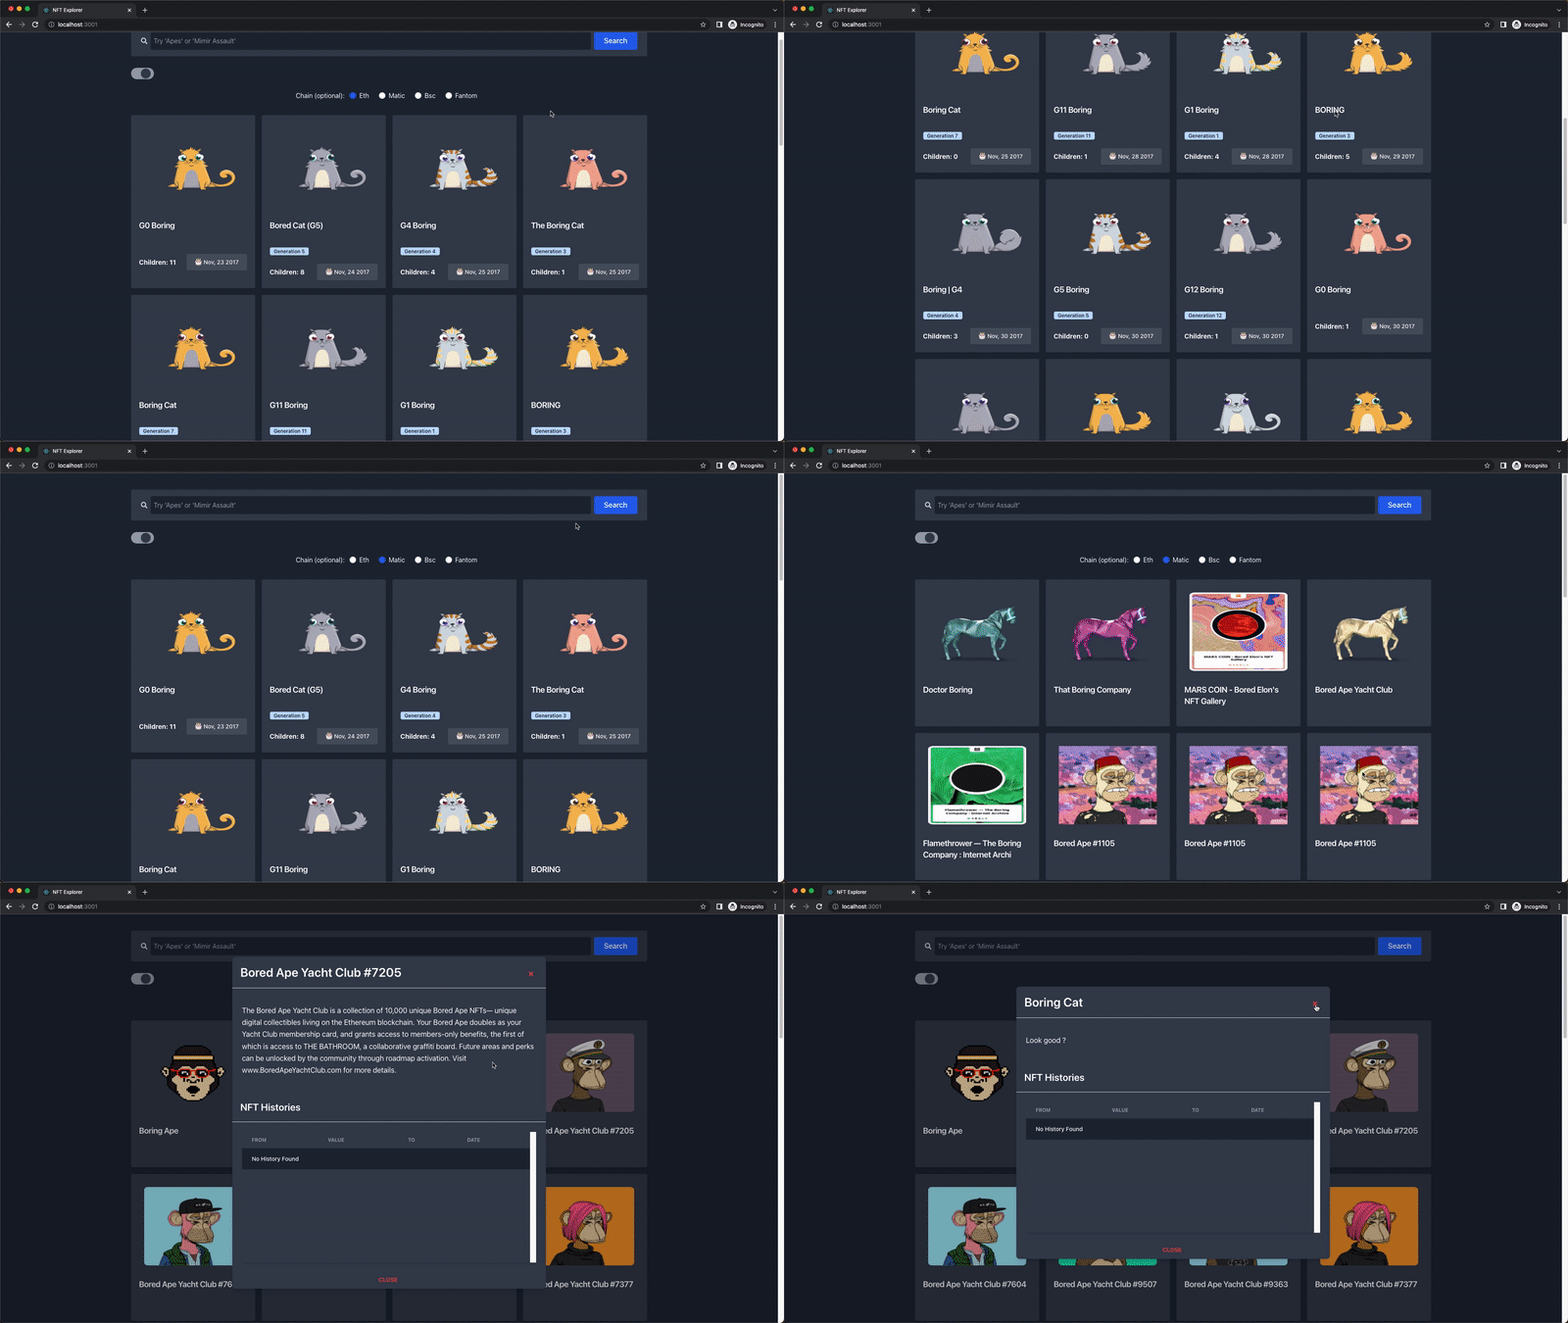
在本教程中,我们将使用 Moralis React SDK 及其跨链 web3 NFT API 来构建一个 React NFT 浏览器应用程序,任何人都可以在其中按名称搜索跨多个链的 NFT。
![https://hicoldcat.oss-cn-hangzhou.aliyuncs.com/img/20220919212849.png https://hicoldcat.oss-cn-hangzhou.aliyuncs.com/img/20220919212849.png]()
NFT 浏览器是一个 dApp,它允许用户获取有关任何 NFT 集合的信息,例如名称、价格、生日、所有者地址、所有权验证、NFT 转移历史等。
![https://hicoldcat.oss-cn-hangzhou.aliyuncs.com/img/20220919212907.png https://hicoldcat.oss-cn-hangzhou.aliyuncs.com/img/20220919212907.png]()
演示
下面是我们将在本文末尾构建的 React NFT 资源管理器应用程序的演示动画:
![https://hicoldcat.oss-cn-hangzhou.aliyuncs.com/img/WFt8uZi1z.gif https://hicoldcat.oss-cn-hangzhou.aliyuncs.com/img/WFt8uZi1z.gif]()
先决条件
本教程使用以下堆栈:
- React
- Tailwind CSS
- Moralis React SDK
- Web3 NFT API
对于本教程,您需要:
第 1 步 - 创建一个 React 应用程序
在这第一步中,我们将使用npx 包管理器创建一个新的 React 应用程序。
运行以下命令为我们的 NFT 资源管理器创建一个新的 React 应用程序:
1
|
npx create-react-app nft-explorer
|
![https://hicoldcat.oss-cn-hangzhou.aliyuncs.com/img/20220919222333.png https://hicoldcat.oss-cn-hangzhou.aliyuncs.com/img/20220919222333.png]()
完成后,运行以下命令导航到您的nft-explorer目录:
在任何代码编辑器中打开您的项目。我们的项目文件夹结构应如下所示:
1
2
3
4
5
6
7
8
|
nft-explorer
├── node_modules
├── public
├── src
├── .gitignore
├── package-lock.json
├── package.json
└── README.md
|
第 2 步 - 安装 Moralis React SDK
现在我们的 React 应用程序已经准备就绪,我们将安装 Moralis React SDK。
从您的nft-explorer目录终端运行以下命令:
1
|
npm install moralis react-moralis
|
第 3 步 - 安装 Tailwind CSS
在这一步中,我们将在 React 应用程序中安装和设置 Tailwind CSS。
运行以下代码以安装 Tailwind CSS 及其对等依赖项:
1
|
npm install -D tailwindcss postcss autoprefixer
|
接下来,运行以下命令,在项目目录的根目录下生成 Tailwind CSS 配置文件:
在您的tailwind.config.js文件中,将内容替换为以下代码:
1
2
3
4
5
6
7
8
|
module.exports = {
  darkMode: "class",
  content: ["./src/**/*.{js,jsx,ts,tsx}"],
  theme: {
    extend: {},
  },
  plugins: [],
};
|
最后,通过使用以下内容更新index.css文件来导入 Tailwind CSS :
1
2
3
|
@tailwind base;
@tailwind components;
@tailwind utilities;
|
要测试 Tailwind CSS 是否正常工作,请使用以下代码更新您的App.js文件:
 1
 2
 3
 4
 5
 6
 7
 8
 9
10
11
12
13
14
15
16
17
18
19
20
21
22
23
24
25
|
import logo from "./logo.svg";
import "./App.css";

function App() {
  return (
    <div className="App">
      <header className="App-header">
        <img src={logo} className="App-logo" alt="logo" />
        <p className="bg-red-900">
          Edit <code>src/App.js</code> and save to reload.
        </p>
        <a
          className="App-link"
          href="https://reactjs.org"
          target="_blank"
          rel="noopener noreferrer"
        >
          Learn React
        </a>
      </header>
    </div>
  );
}

export default App;
|
接下来,通过运行以下代码来启动您的 React 项目服务器:
浏览器打开localhost:3000. 我们的 React 页面应该如下所示:
![https://hicoldcat.oss-cn-hangzhou.aliyuncs.com/img/20220919222722.png https://hicoldcat.oss-cn-hangzhou.aliyuncs.com/img/20220919222722.png]()
红色背景文本表示 Tailwind CSS 正在我们的 React 应用程序中运行。
第 4 步 - 设置 Moralis 服务器
Moralis 服务器允许您使用 Moralis SDK 来加快 dApp 的开发。
在这一步中,我们将设置我们的 Moralis 云服务器并生成我们的 Moralis 服务器 API 密钥。
转到Moralis.io并单击“免费注册”按钮:
![https://hicoldcat.oss-cn-hangzhou.aliyuncs.com/img/20220919222812.png https://hicoldcat.oss-cn-hangzhou.aliyuncs.com/img/20220919222812.png]()
提供有效的电子邮件地址和密码以创建您的 Moralis 帐户:
![https://hicoldcat.oss-cn-hangzhou.aliyuncs.com/img/20220919222823.png https://hicoldcat.oss-cn-hangzhou.aliyuncs.com/img/20220919222823.png]()
下一页是您将回答几个简短问题的地方。
完成创建 Moralis 帐户后单击下一步:
![https://hicoldcat.oss-cn-hangzhou.aliyuncs.com/img/20220919222833.png https://hicoldcat.oss-cn-hangzhou.aliyuncs.com/img/20220919222833.png]()
成功注册后,您将被重定向到 Moralis 仪表板。
在您的仪表板上:
1. 点击“创建新服务器”按钮:
![https://hicoldcat.oss-cn-hangzhou.aliyuncs.com/img/20220919222844.png https://hicoldcat.oss-cn-hangzhou.aliyuncs.com/img/20220919222844.png]()
2. 选择“主网服务器”:
![https://hicoldcat.oss-cn-hangzhou.aliyuncs.com/img/20220919222859.png https://hicoldcat.oss-cn-hangzhou.aliyuncs.com/img/20220919222859.png]()
3. 系统会提示您确认您的注册电子邮件地址:
![https://hicoldcat.oss-cn-hangzhou.aliyuncs.com/img/20220919222909.png https://hicoldcat.oss-cn-hangzhou.aliyuncs.com/img/20220919222909.png]()
4. 添加一个新的主网服务器:
从弹出窗口:
- 命名您的 Moralis 服务器/实例 (nft -explorer )。
- 选择离您最近的地区。
- 选择一个网络(主网)。
- 对于本教程,我们将选择所有可用的链。
- 完成后单击“添加实例”按钮。
![https://hicoldcat.oss-cn-hangzhou.aliyuncs.com/img/20220919222929.png https://hicoldcat.oss-cn-hangzhou.aliyuncs.com/img/20220919222929.png]()
5. 等待 Moralis 设置您的服务器实例:
![https://hicoldcat.oss-cn-hangzhou.aliyuncs.com/img/20220919222940.png https://hicoldcat.oss-cn-hangzhou.aliyuncs.com/img/20220919222940.png]()
第 5 步 - Moralis 服务器详细信息
创建服务器实例后,您可以通过单击“查看详细信息”按钮查看服务器凭据:
![https://hicoldcat.oss-cn-hangzhou.aliyuncs.com/img/20220919222954.png https://hicoldcat.oss-cn-hangzhou.aliyuncs.com/img/20220919222954.png]()
我们需要的重要服务器详细信息是:
![https://hicoldcat.oss-cn-hangzhou.aliyuncs.com/img/20220919223006.png https://hicoldcat.oss-cn-hangzhou.aliyuncs.com/img/20220919223006.png]()
专业提示:不要公开您的服务器详细信息,因为它们可以访问您的 dApp。
第 6 步 - 在 React 中初始化 Moralis SDK
设置 Moralis 服务器并安装 Moralis SDK(参见步骤 2)后,下一步是通过 Moralis SDK 在我们的 React 应用程序和 Moralis 服务器之间建立连接。
在项目的根目录下创建一个.env文件,并将 Moralis 服务器详细信息存储在上面,如下所示:
1
2
|
REACT_APP_SERVER_URL=https://XXXXXX.usemoralis.com:2053/server
REACT_APP_APP_ID=XXXXXXXXXXXXXXXXXXXXXXXXXXXXXX
|
用您的 Moralis 凭证替换占位符。接下来,我们需要在更新src/.env文件后重新启动我们的服务器。
使用下面的快捷键停止您的服务器:
使用以下命令再次启动您的服务器:
接下来,我们将在我们的App.js文件中创建一个initMoralis函数,如下所示:
 1
 2
 3
 4
 5
 6
 7
 8
 9
10
11
12
13
14
15
16
17
18
19
20
21
22
23
24
25
26
27
28
29
30
31
32
33
34
35
36
37
38
39
|
import logo from "./logo.svg";
import "./App.css";
import Moralis from "moralis";

function App() {

// initMoralis function
  const initMoralis = async () => {
// connect to Moralis server
    await Moralis.start({
      serverUrl: process.env.REACT_APP_SERVER_URL,
      appId: process.env.REACT_APP_APP_ID,
    });
  };

// call/invoke initMoralis function
  initMoralis();

  return (
    <div className='App'>
      <header className='App-header'>
        <img src={logo} className='App-logo' alt='logo' />
        <p className='bg-red-900'>
          Edit <code>src/App.js</code> and save to reload.
        </p>
        <a
          className='App-link'
          href='https://reactjs.org'
          target='_blank'
          rel='noopener noreferrer'
        >
          Learn React
        </a>
      </header>
    </div>
  );
}

export default App;
|
我们initMoralis函数中的Moralis.start()方法将与我们的 Moralis 服务器建立连接,允许我们访问 Moralis SDK 资源和 NFT API。
专业提示:不要在initMoralis函数中对 Moralis 详细信息进行硬编码。
什么是 NFT API?
NFT 是不可替代的代币,它们存储在区块链上。API 是一种应用程序编程接口,它使两个或多个软件能够相互交互和共享资源。
NFT API 是端点,允许您的 dApp 连接到区块链并查询 NFT 的元数据、检索 NFT 传输数据、验证 NFT 所有权、查找 NFT 的价格,并返回有关来自不同区块链的所有 NFT 集合的信息。
NFT API - Moralis NFT API
Moralis NFT API 是一种索引 API,易于管理且易于集成到您的 dApp 中。这是一个跨链 NFT 接口,用于返回元数据并通过 Moralis 获取有关 NFT 的所有信息。
以下是我们将用于为本教程构建 NFT 资源管理器的 Moralis NFT API 端点:
searchNFTsAPI -用于搜索 NFTgetNFTTransfersAPI - 用于获取 NFT 传输历史
您可以从此处找到 Moralis NFT API 端点的完整列表。
第 7 步 - 创建组件
在本教程步骤中,我们将创建八个组件:
src/pages
src/components
NftSearchBar.jsxNftCardContainer.jsxNftCard.jsxNftDescriptionModal.jsxNftHistoryTable.jsxNftChainRadio.jsxThemeSwitch.jsx
让我们创建NftExplore组件,它将作为我们的 NFT 资源管理器主页。
在您的src文件夹中:
- 创建一个新
pages文件夹。
- 在 pages 文件夹中,创建一个新
NftExplore.jsx文件。
将下面的 React 组件复制并粘贴到您的NftExplore.jsx文件中:
1
2
3
4
|
import React from "react";
export const NftExplore = () => {
  return <div className='text-white'>NftExplore</div>;
};
|
您的文件夹结构应如下所示:
![https://hicoldcat.oss-cn-hangzhou.aliyuncs.com/img/20220919223348.png https://hicoldcat.oss-cn-hangzhou.aliyuncs.com/img/20220919223348.png]()
使用以下代码更新您的src/App.js文件:
 1
 2
 3
 4
 5
 6
 7
 8
 9
10
11
12
13
14
15
16
17
18
19
20
21
22
23
24
25
26
27
28
29
30
31
32
33
|
import "./App.css";
import Moralis from "moralis";
import { useState } from "react";
import { NftExplore } from "./pages/NftExplore";

function App() {
  const userCurrentTheme = JSON.parse(localStorage.getItem("isDark"));
  const [isDark, setisDark] = useState(userCurrentTheme || true);

 // initMoralis function
  const initMoralis = async () => {
 // connect to Moralis server
    await Moralis.start({
      serverUrl: process.env.REACT_APP_SERVER_URL,
      appId: process.env.REACT_APP_APP_ID,
    });
  };

 // call/invoke initMoralis function
  initMoralis();

  return (
    <main className={isDark ? "dark" : ""}>
      <div className='dark:bg-gray-800 pt-10 px-8 bg-gray-50'>
        <section className='container mx-auto w-full max-w-screen-xl min-h-screen'>
          <NftExplore settheme={setisDark} />
        </section>
      </div>
    </main>
  );
}

export default App;
|
我们的 NFT 浏览器默认会有一个深色主题,可以切换到浅色主题(参见演示),我们将使用isDark组件状态来跟踪更改。我们还希望通过从用户的本地存储中获取用户的最后一个主题来跟踪它。
我们的 NFT 浏览器页面应如下所示:
![https://hicoldcat.oss-cn-hangzhou.aliyuncs.com/img/20220919223511.png https://hicoldcat.oss-cn-hangzhou.aliyuncs.com/img/20220919223511.png]()
构建 NFT 搜索栏
我们的第一个组件是NftSearchBar,它是一个输入框和一个搜索按钮,供用户输入并按其名称搜索 NFT。
在您的src文件夹中:
- 创建一个新
components文件夹。
- 接下来,在
src/components文件夹内创建一个Nfts新文件夹。
- 最后,在
components/Nfts文件夹中创建一个新NftSearchBar.jsx文件并粘贴以下代码:
 1
 2
 3
 4
 5
 6
 7
 8
 9
10
11
12
13
14
15
16
17
18
19
20
21
22
23
24
25
26
27
28
29
30
31
32
33
34
35
36
37
38
39
40
41
42
43
44
|
import React from "react";

export const NftSearchBar = ({
  searchQuery,
  searchNFTs,
  handleChange
}) => {
  return (
    <React.Fragment>
      <div className='shadow p-4 flex mx-2 dark:bg-gray-700 rounded'>
        <span className='w-auto flex justify-center items-center text-grey p-2'>
          <svg
            aria-hidden='true'
            focusable='false'
            data-prefix='fas'
            data-icon='search'
            className='w-4 text-gray-300'
            role='img'
            xmlns='http://www.w3.org/2000/svg'
            viewBox='0 0 512 512'
          >
            <path
              fill='currentColor'
              d='M505 442.7L405.3 343c-4.5-4.5-10.6-7-17-7H372c27.6-35.3 44-79.7 44-128C416 93.1 322.9 0 208 0S0 93.1 0 208s93.1 208 208 208c48.3 0 92.7-16.4 128-44v16.3c0 6.4 2.5 12.5 7 17l99.7 99.7c9.4 9.4 24.6 9.4 33.9 0l28.3-28.3c9.4-9.4 9.4-24.6.1-34zM208 336c-70.7 0-128-57.2-128-128 0-70.7 57.2-128 128-128 70.7 0 128 57.2 128 128 0 70.7-57.2 128-128 128z'
            />
          </svg>
        </span>
        <input
          className='w-full rounded p-2 dark:bg-gray-800 dark:text-white focus:bg-gray-200 outline-none'
          type='text'
          value={searchQuery}
          placeholder="Try 'Apes' or 'Mimir Assault'"
          onChange={handleChange}
        />
        <button
          className='bg-blue-600 mx-2 text-white rounded p-2 px-6 hover:bg-blue-500'
          onClick={searchNFTs}
        >
          <p className='font-medium text-lg'>Search</p>
        </button>
      </div>
    </React.Fragment>
  );
};
|
该NftSearchBar组件将收到三个道具:
- searchQuery ,这是用户输入的值
- searchNFTs函数用于搜索按钮
- searchQuery用于跟踪handleChange函数输入的更改
您的文件夹结构应如下所示:
![https://hicoldcat.oss-cn-hangzhou.aliyuncs.com/img/20220919224030.png https://hicoldcat.oss-cn-hangzhou.aliyuncs.com/img/20220919224030.png]()
使用以下代码行更新您的NftExplore.jsx文件组件:
 1
 2
 3
 4
 5
 6
 7
 8
 9
10
11
12
13
14
15
16
17
18
19
20
21
22
23
24
25
26
27
28
29
30
31
32
33
34
35
36
37
38
39
40
41
42
43
44
45
46
47
48
49
50
51
52
53
54
55
56
57
58
59
60
61
62
63
64
65
66
67
68
69
70
71
72
73
74
75
76
77
78
79
80
81
82
83
|
import React, { useState, useEffect } from "react";
import Moralis from "moralis";
import { NftSearchBar } from "../components/Nfts/NftSearchBar";

export const NftExplore = ({ settheme }) => {

  // 1. loading state
  const [loading, setLoading] = useState(false);

  // 2. The search query state
  const [searchQuery, setSearchQuery] = useState("");

  // 3. The chain state
  const [chain, setchain] = useState("eth");

  // 4. The search results state
  const [searchResult, setSearchResult] = useState(null);

  // 5. The search query handler
  const handleChange = (e) => {
    setSearchQuery(e.target.value);
  };

  // 6. The search function
  const searchNFTs = async () => {
    try {

      // 6.1. Set the loading state to true
      setLoading(true);

      // 6.2. Search for the NFTs
      const options = {
        q: searchQuery || "bored",
        chain: chain,
        filter: "name",
        limit: "30",
      };

      // 6.3. Get the search results
      const NFTs = await Moralis.Web3API.token.searchNFTs(options);

      // 6.4. If there is a result
      if (NFTs.result) {

        // 6.4.1. Convert the result metadata to an array
        const convertMetadata = NFTs.result.map((nft) => {
          nft.metadata = JSON.parse(nft.metadata);
          return nft;
        });

        // 6.4.2. Set the search result state
        setSearchResult(convertMetadata);

        // 6.4.3. Set the loading state to false
        setLoading(false);
      }
    } catch (error) {
      // 6.4.4. If there is an error, alert the user
      alert(error);

      // 6.4.5. Set the loading state to false
      setLoading(false);
    }
  };

  // 7. Search for "bored" NFTs on mount
  useEffect(() => {
    searchNFTs();
  }, []);

  console.log(searchResult);

  return (
    <React.Fragment>
      {/* NFT search bar section */}
      <NftSearchBar
        searchQuery={searchQuery}
        searchNFTs={searchNFTs}
        handleChange={handleChange}
      />
    </React.Fragment>
  );
};
|
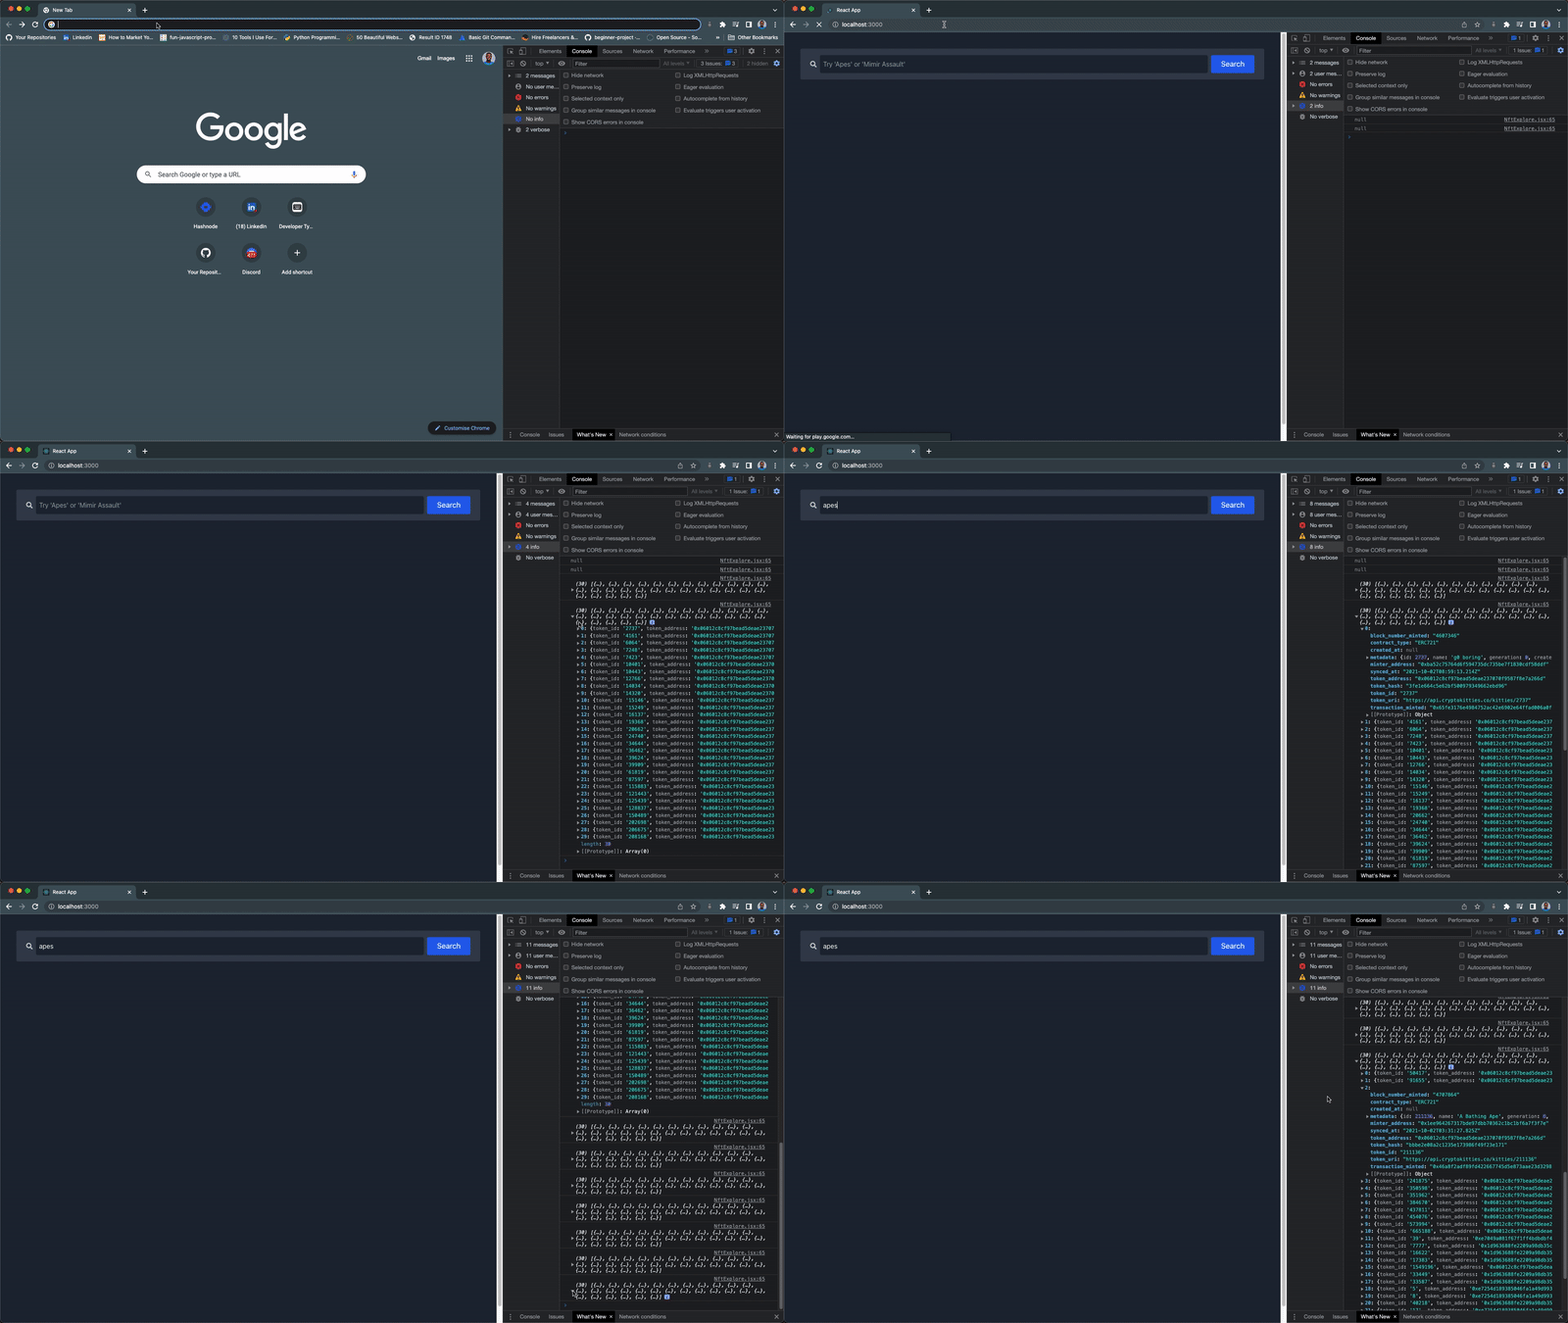
在上面的NftExplore.jsx组件中,我们使用Moralis.Web3API.token.searchNFTs(options)来查找名称与区块链中用户查询匹配的所有 NFT(默认为eth)。
options参数是一个包含以下内容的对象:
- query :用户的查询(默认为 “bored”)
- chain:我们想从n哪个区块链上搜索。
- filter:我们要按名称过滤。
- limit:我们只想要来自eth链的 30 个 NFT 搜索结果。
因为返回的 NFT 的元数据是 string类型,所以我们使用该JSON.parse方法将每个 NFT 元数据从string转换为一个对象,然后再将它们设置为我们的searchResult状态。
最后,当页面加载时,默认情况下useEffect将运行searchNFTs带有“bored”查询的函数。
我们的 NFT 浏览器页面应如下所示:
![https://hicoldcat.oss-cn-hangzhou.aliyuncs.com/img/20220919225738.png https://hicoldcat.oss-cn-hangzhou.aliyuncs.com/img/20220919225738.png]()
您可以继续搜索您喜欢的任何 NFT。
![https://hicoldcat.oss-cn-hangzhou.aliyuncs.com/img/oVa8c9_x8.gif https://hicoldcat.oss-cn-hangzhou.aliyuncs.com/img/oVa8c9_x8.gif]()
构建 NFT 卡片
现在我们可以从区块链中搜索和检索 NFT,让我们创建NftCardContainer.jsx组件以将 NFT 结果呈现在卡片中。
该NftCardContainer组件将接收两个props:搜索查询的searchResult和loading状态。
在Nfts文件夹中:
- 创建一个新
NftCardContainer.jsx文件并粘贴以下代码:
 1
 2
 3
 4
 5
 6
 7
 8
 9
10
11
12
13
14
15
16
17
18
19
20
21
|
import React from "react";
import { NftCard } from "./NftCard";

export const NftCardContainer = ({ searchResult, loading }) => {
  return (
    <React.Fragment>
      <section
        className={`grid grid-cols-1 mt-7 sm:grid-cols-2 md:grid-cols-3 xl:grid-cols-4
       ${loading ? "opacity-5 transition-opacity" : null}`}
      >
        {searchResult?.length > 0 ? (
          searchResult?.map((nft, index) => <NftCard data={nft} key={index} />)
        ) : (
          <h3 className='dark:text-gray-400 mx-2'>
            No Result found. Try "apes"
          </h3>
        )}
      </section>
    </React.Fragment>
  );
};
|
接下来,我们将创建NftCard组件来显示图像、名称、NFT 拥有的child数量、生日和 NFT generation。
在您的Nfts文件夹中创建一个新文件NftCard.jsx并粘贴以下代码:
 1
 2
 3
 4
 5
 6
 7
 8
 9
10
11
12
13
14
15
16
17
18
19
20
21
22
23
24
25
26
27
28
29
30
31
32
33
34
35
36
37
38
39
40
41
42
43
44
45
46
47
48
49
50
51
52
53
54
55
56
57
58
59
60
61
62
63
64
65
66
67
68
69
70
71
72
73
74
75
|
import React, { useState } from "react";
import DateFormater from "../../helper/dateFormater";
import NftDescriptionModal from "./NftDescriptionModal";

export const NftCard = ({ data }) => {
  const { metadata, token_address } = data;
  const {
    name,
    image_url_png,
    image,
    children,
    birthday,
    description,
    generation,
  } = metadata;

  const [showModal, setShowModal] = useState(false);

  const handleShowModal = () => {
    setShowModal(!showModal);
  };

  return (
    <React.Fragment>
      <div
        className='max-w-sm bg-white m-2 rounded shadow-md dark:bg-gray-700 dark:border-gray-400'
        onClick={handleShowModal}
      >
        <img
          className='p-8 h-64 w-full'
          src={image_url_png || image}
          alt={name}
        />
        <div className='px-5 pb-5'>
          <h5 className='text-xl capitalize h-16 font-semibold tracking-tight text-gray-900 dark:text-white'>
            {name.slice(0, 50)}
          </h5>

          {generation ? (
            <span className='bg-blue-100 text-blue-800 text-xs font-semibold px-2.5 py-0.5 rounded dark:bg-blue-200 dark:text-gray-800'>
              Generation {generation}
            </span>
          ) : null}

          <div className='flex flex-wrap justify-between items-center mt-5'>
            {children && (
              <span className='text-md font-bold text-gray-900 dark:text-white'>
                Children: {children?.length}
              </span>
            )}

            {birthday && (
              <div className='text-white bg-blue-600 hover:bg-blue-500 focus:ring-4 focus:outline-none focus:ring-blue-300 font-medium rounded text-sm px-5 py-2.5 text-center dark:bg-gray-600 dark:hover:bg-blue-600 dark:focus:ring-blue-300'>
                🎂
                <span className='ml-2'>
                  {DateFormater.yearMonthDate(birthday)}
                </span>
              </div>
            )}
          </div>
        </div>
      </div>

      {/* Nft description modal */}
      {showModal && (
        <NftDescriptionModal
          token_address={token_address}
          nftName={name}
          nftDescription={description}
          handleShowModal={handleShowModal}
        />
      )}
    </React.Fragment>
  );
};
|
从上面的代码中,NftCard组件将收到一个data属性,其中包含每个 NFT 的metadata和token_address。接下来,我们从元数据对象中解构 NFT 详细信息。
元数据是“提供有关其他数据的信息的数据” -维基百科
如果 NFT 在其元数据中包含数据,我们希望显示generation和birthday信息。此外,NFT 的生日采用ISO 日期格式,我们将使用日期helper将其转换为月、日年格式。
在src文件夹中创建DateFormater helper函数的步骤:
- 创建一个新的helper文件夹。
- 在
src/helper文件夹中,创建一个新dateFormater.js文件并粘贴以下代码:
 1
 2
 3
 4
 5
 6
 7
 8
 9
10
11
12
13
14
|
// format ISOdate date to Month, Day Year
const yearMonthDate = (ISOdate) => {
  const date = new Date(ISOdate);
  const monthName = date.toLocaleString("default", { month: "short" });
  return (
    monthName + ", " + date.getDate() + " " + date.getFullYear()
  );
};

const DateFormater = {
  yearMonthDate,
};

export default DateFormater;
|
接下来,NftDescriptionModal组件是点击 NFT 时弹出的 modal,它接收并显示 NFT 的名称、描述和最近 10 次转账交易历史。
在您的Nfts文件夹中创建一个新文件NftDescriptionModal.jsx并粘贴以下代码:
 1
 2
 3
 4
 5
 6
 7
 8
 9
10
11
12
13
14
15
16
17
18
19
20
21
22
23
24
25
26
27
28
29
30
31
32
33
34
35
36
37
38
39
40
41
42
43
44
45
46
47
48
49
50
51
52
53
54
55
|
import React from "react";
import { NftHistoryTable } from "./NftHistoryTable";

export default function NftDescriptionModal({
  nftName,
  nftDescription,
  handleShowModal,
  token_address,
}) {
  return (
    <React.Fragment>
      <div className='justify-center items-center flex overflow-x-hidden overflow-y-auto fixed inset-0 z-50 outline-none focus:outline-none pt-5'>
        <div className='relative my-6 mx-auto w-9/12 max-w-3xl'>
          {/*content*/}
          <div className='border-0 rounded-lg dark:bg-gray-700 shadow-lg relative flex flex-col w-full bg-white outline-none focus:outline-none'>
            {/*header*/}
            <div className='flex items-start justify-between p-5 border-b border-solid border-blueGray-200 rounded-t'>
              <h3 className='text-3xl font-semibold dark:text-white capitalize'>
                {nftName}
              </h3>
              <button
                className='p-1 ml-auto dark:bg-gray-700 bg-transparent border-0 text-black float-right text-3xl leading-none font-semibold outline-none focus:outline-none'
                onClick={handleShowModal}
              >
                <span className='bg-transparent text-red-500 h-6 w-6 text-2xl block outline-none focus:outline-none'>
                  ×
                </span>
              </button>
            </div>
            {/*body*/}
            <div className='relative p-6 flex-auto'>
              <p className='my-4 dark:text-white text-lg leading-relaxed'>
                {nftDescription}
              </p>
            </div>
            <h3 className='p-5 text-2xl font-semibold dark:text-white'>
              NFT Histories
            </h3>
            <div className='p-6 border-t border-solid border-blueGray-200 rounded-b'>
              <NftHistoryTable nftAddress={token_address} />
            </div>
            <button
              className='text-red-500 background-transparent font-bold uppercase px-6 py-2 text-sm outline-none focus:outline-none mr-1 mb-1 ease-linear transition-all duration-150'
              type='button'
              onClick={handleShowModal}
            >
              Close
            </button>
          </div>
        </div>
      </div>
      <div className='opacity-25 fixed inset-0 z-40 bg-black'></div>
    </React.Fragment>
  );
}
|
构建 NFT 历史组件
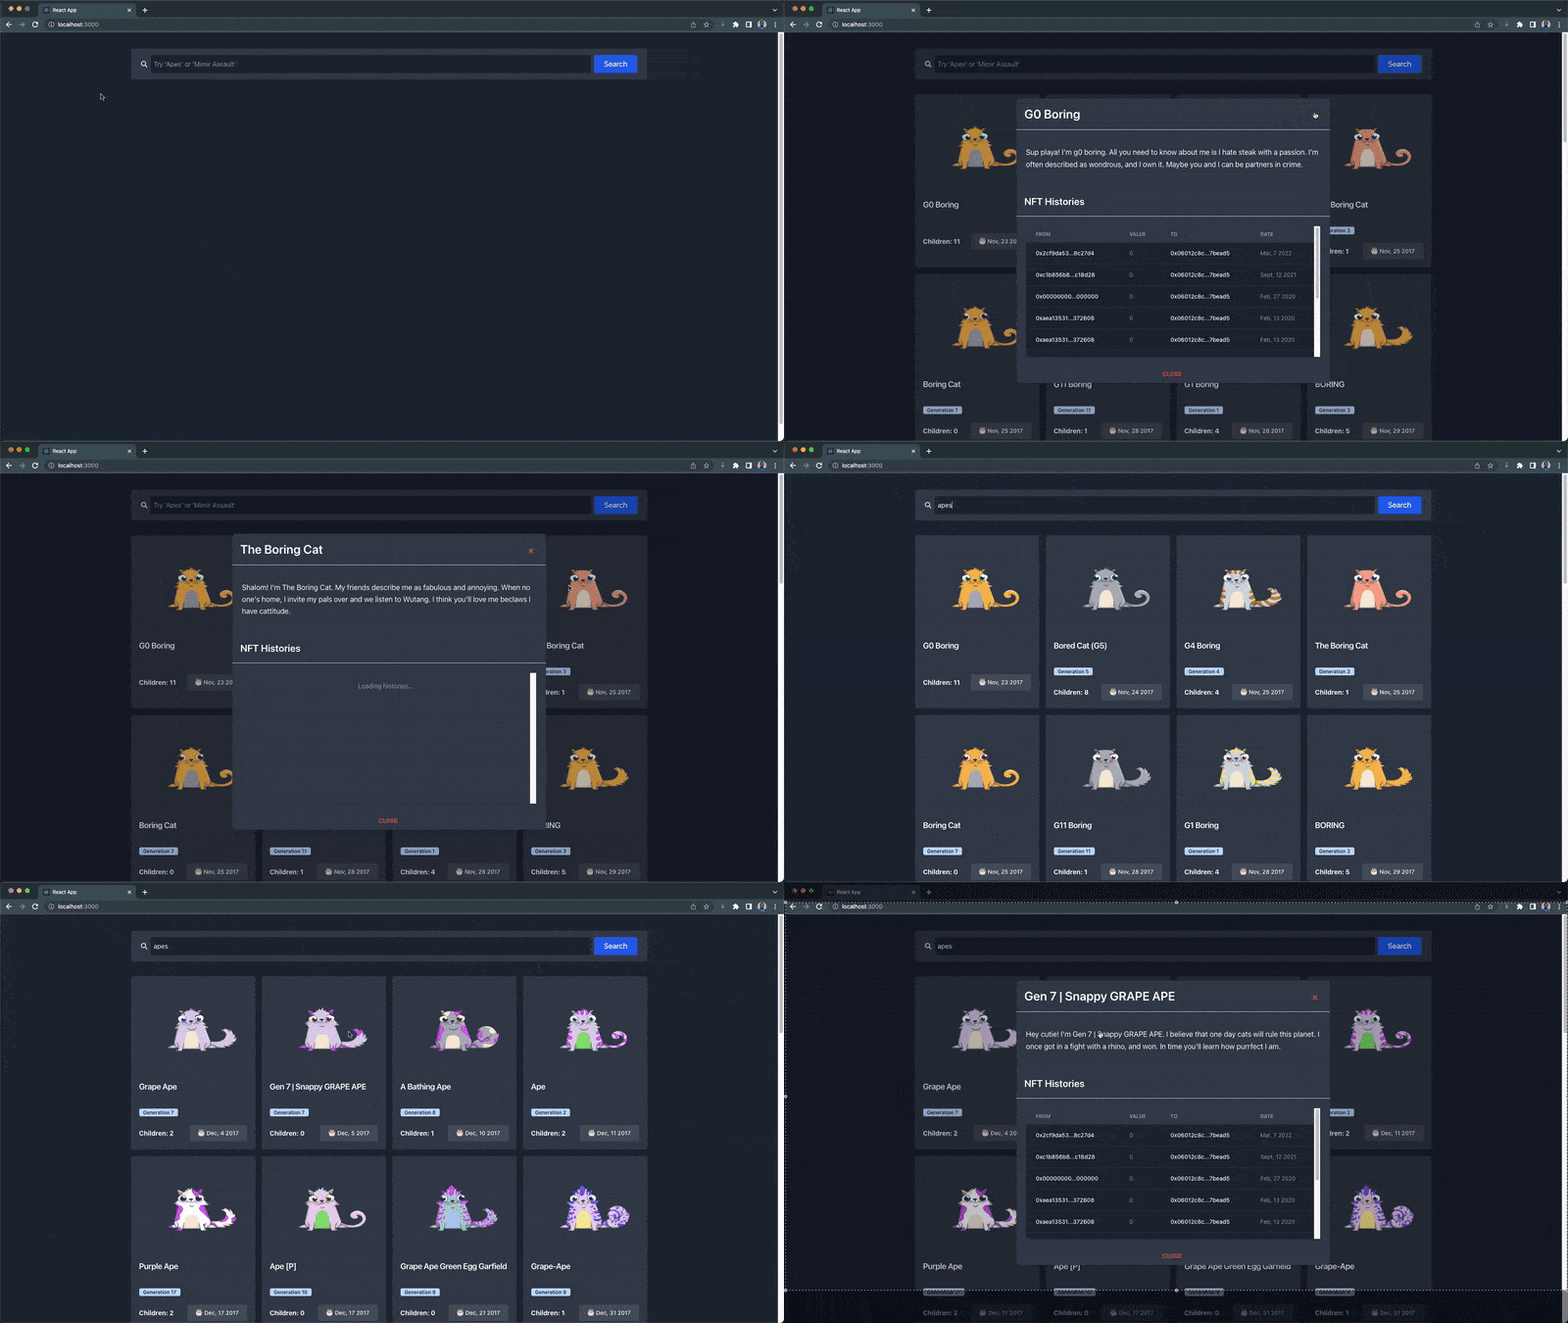
在本节中,我们将使用getNFTTransfers端点检索任何选定 NFT 的最后 10 次转账交易历史,使用它们的令牌地址,该地址作为道具传递给NftHistoryTable组件。
在您的Nfts文件夹中创建一个NftHistoryTable.jsx新文件并粘贴以下代码:
 1
 2
 3
 4
 5
 6
 7
 8
 9
10
11
12
13
14
15
16
17
18
19
20
21
22
23
24
25
26
27
28
29
30
31
32
33
34
35
36
37
38
39
40
41
42
43
44
45
46
47
48
49
50
51
52
53
54
55
56
57
58
59
60
61
62
63
64
65
66
67
68
69
70
71
72
73
74
75
76
77
78
79
80
81
82
83
84
85
86
87
88
89
90
91
92
93
94
95
96
|
import Moralis from "moralis";
import React, { useEffect, useState } from "react";
import DateFormater from "../../helper/dateFormater";

export const NftHistoryTable = ({ nftAddress }) => {
  // history state
  const [history, setHistory] = useState(null);

  const fetchNftHistory = async () => {
    try {
      const options = {
        address: nftAddress,
        limit: "10",
      };
      const transfersNFT = await Moralis.Web3API.account.getNFTTransfers(
        options
      );
      setHistory(transfersNFT.result);
    } catch (error) {
      alert(error);
    }
  };

  useEffect(() => {
    fetchNftHistory();
  }, [nftAddress]);

  return (
    <div className='relative overflow-y-scroll h-80 shadow-md sm:rounded-lg w-full'>
      {history ? (
        <table className='w-full text-sm text-left text-gray-500 dark:text-gray-400'>
          <thead className='text-xs text-gray-700 uppercase bg-gray-50 dark:bg-gray-700 dark:text-gray-400'>
            <tr>
              <th scope='col' className='px-6 py-3'>
                From
              </th>
              <th scope='col' className='px-6 py-3'>
                Value
              </th>
              <th scope='col' className='px-6 py-3'>
                To
              </th>
              <th scope='col' className='px-6 py-3'>
                Date
              </th>
            </tr>
          </thead>
          <tbody>
            {history.length > 0 ? (
              history.map(
                (
                  { from_address, value, to_address, block_timestamp },
                  index
                ) => {
                  return (
                    <tr
                      className='bg-white border-b dark:bg-gray-800 dark:border-gray-700 hover:bg-blue-600 hover:text-white dark:hover:bg-gray-600'
                      key={index}
                    >
                      <td className='px-6 py-4 font-medium text-gray-900 dark:text-white whitespace-nowrap'>
                        {from_address.substring(0, 10)}...
                        {from_address.substring(12, 18)}
                      </td>
                      <td className='px-6 py-4'>{value}</td>
                      <td className='px-6 py-4 font-medium text-gray-900 dark:text-white whitespace-nowrap'>
                        {to_address.substring(0, 10)}...
                        {to_address.substring(12, 18)}
                      </td>
                      <td className='px-6 py-4'>
                        {DateFormater.yearMonthDate(block_timestamp)}
                      </td>
                    </tr>
                  );
                }
              )
            ) : (
              <tr className='bg-white border-b dark:bg-gray-800 dark:border-gray-700 hover:bg-gray-50 dark:hover:bg-gray-600'>
                <th
                  scope='row'
                  className='px-6 py-4 font-medium text-gray-900 dark:text-white whitespace-nowrap'
                  colSpan={4}
                >
                  No History Found
                </th>
              </tr>
            )}
          </tbody>
        </table>
      ) : (
        <div className='text-center text-gray-500 p-5 dark:text-gray-400'>
          Loading histories...
        </div>
      )}
    </div>
  );
};
|
接下来,在NftExplore.jsx组件内部导入NftCardContainer组件:
1
|
import { NftCardContainer } from "../components/Nfts/NftCardContainer";
|
最后,像这样渲染NftCardContainer.jsx组件。
1
2
|
{/* Render below the Nft Search Bar component*/}
<NftCardContainer searchResult={searchResult} loading={loading} />
|
我们的 NFT 浏览器页面的外观和功能应如下所示:
![https://hicoldcat.oss-cn-hangzhou.aliyuncs.com/img/6m_r6N61W.gif https://hicoldcat.oss-cn-hangzhou.aliyuncs.com/img/6m_r6N61W.gif]()
在上面的演示中,浏览器页面默认显示 30 个bored的 NFT,并呈现用户的新搜索结果。单击 NFT 卡时会弹出描述和历史模式。
继续搜索您选择的任何 NFT 🔎
构建 NFT 链组件
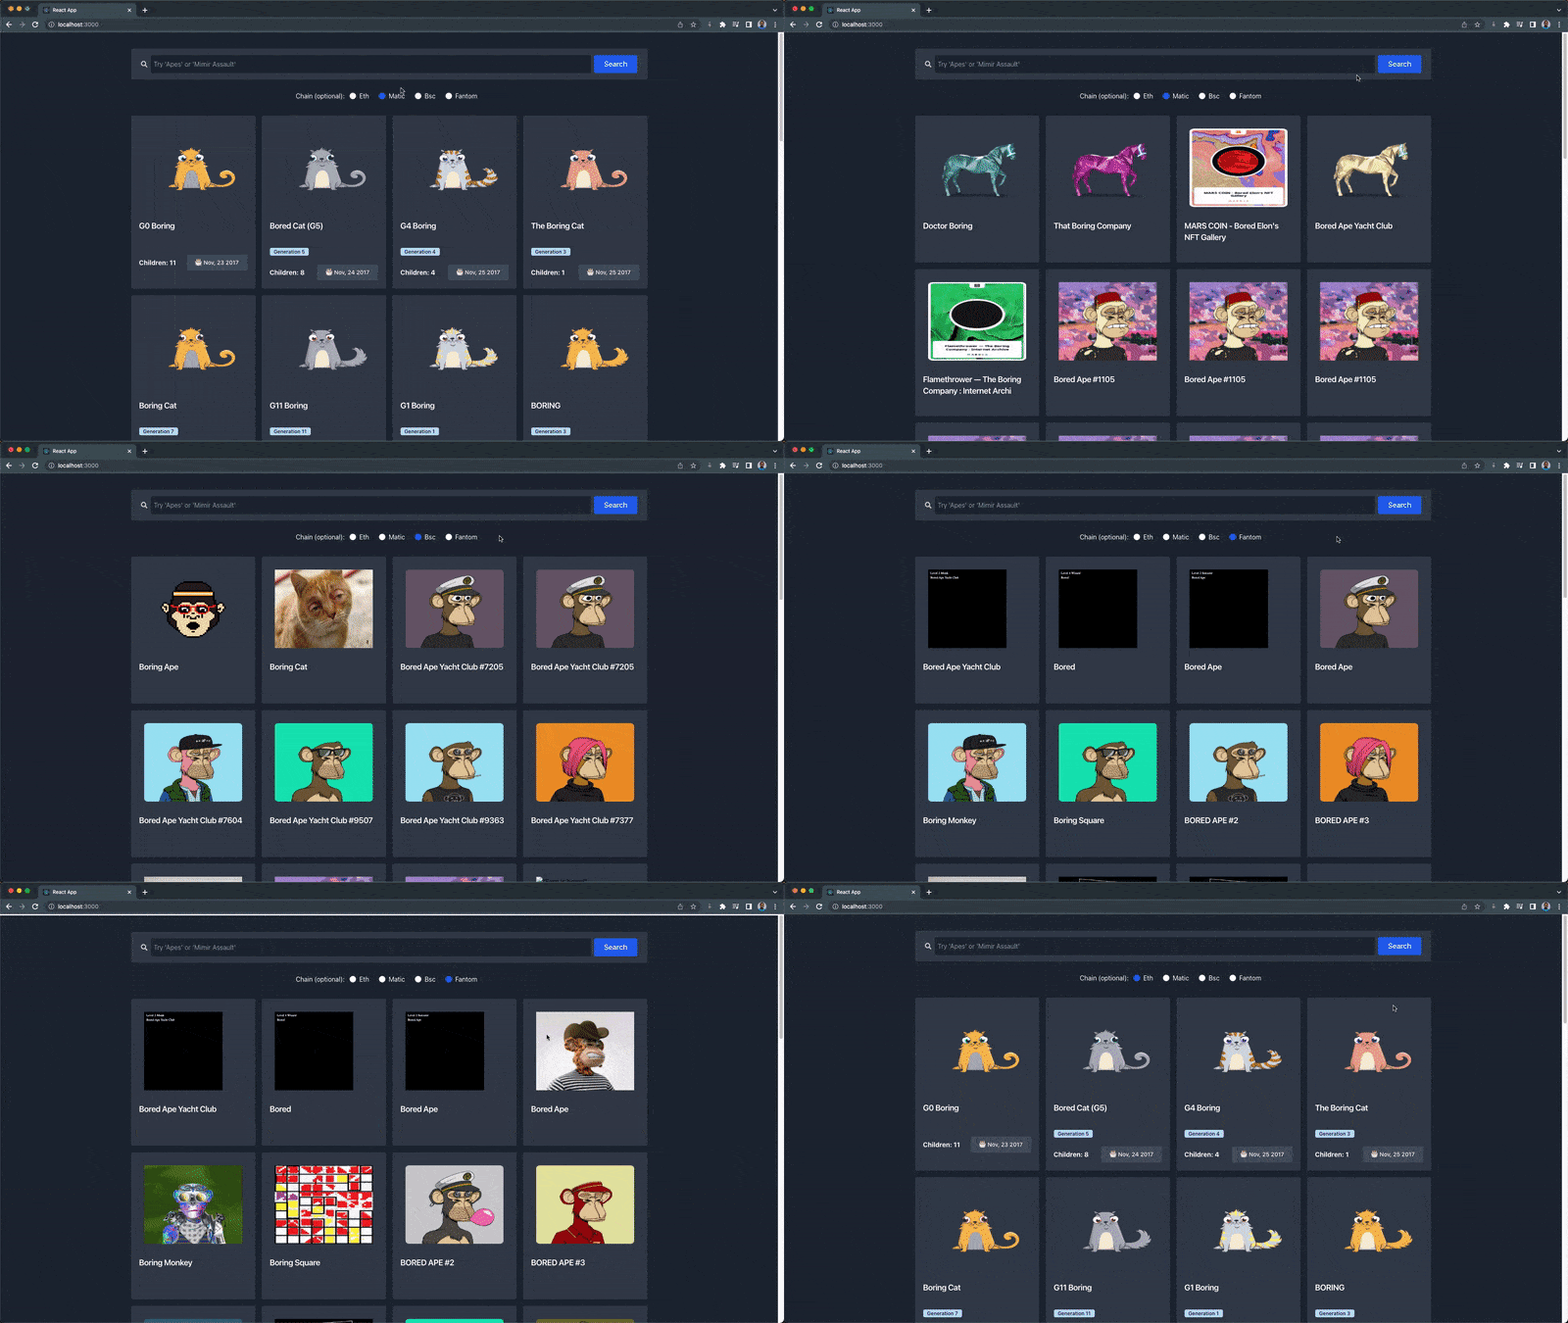
到本节为止,我们只是从以太坊链中搜索。在本节中,我们将创建 NFT 链radio input 组件。这将允许用户从不同的区块链中搜索 NFT。
我们的 NFT 浏览器将支持以下链:
- eth (默认) - 以太坊链
- matic - Polygon 链
- bsc - 币安智能链
- fantom - Fantom 链
您可以在此处查看 Moralis 上支持的链的完整列表。
在我们的Nfts文件夹中:
- 创建一个新
NftChainRadio.jsx文件,并将以下代码粘贴到其中:
 1
 2
 3
 4
 5
 6
 7
 8
 9
10
11
12
13
14
15
16
17
18
19
20
21
22
23
24
25
26
27
28
29
30
31
32
33
34
35
36
|
import React from "react";

export const NftChainRadio = ({ handleSelectedChain }) => {
  const chains = ["eth", "matic", "bsc", "fantom"];
  return (
    <React.Fragment>
      <div className='flex justify-center mt-7'>
        <h3 className='text-gray-700 dark:text-white'>Chain (optional):</h3>

        {chains.map((chainNickname) => {
          return (
            <div
              className='form-check form-check-inline px-3'
              key={chainNickname}
            >
              <input
                className='form-check-input form-check-input appearance-none rounded-full h-4 w-4 border border-gray-300 bg-white checked:bg-blue-600 checked:border-blue-600 focus:outline-none transition duration-200 mt-1 align-top bg-no-repeat bg-center bg-contain float-left mr-2 cursor-pointer'
                type='radio'
                name='chain'
                value={chainNickname}
                id={chainNickname}
                onChange={handleSelectedChain}
              />
              <label
                className='form-check-label inline-block text-gray-800 dark:text-white capitalize'
                htmlFor={chainNickname}
              >
                {chainNickname}
              </label>
            </div>
          );
        })}
      </div>
    </React.Fragment>
  );
};
|
在上面的代码中,我们通过循环支持链的数组来显示radio input中的链。该NftChainRadio组件接受一个handleSelectedChain属性,一个跟踪用户所选链的函数(请参阅构建 NFT 搜索栏)。
接下来,在NftExplore.jsx页面组件内部导入NftChainRadio组件:
1
|
import { NftChainRadio } from "../components/Nfts/NftChainRadio";
|
接下来,添加 handleSelectedChain 函数:
1
2
3
|
const handleSelectedChain = (e) => {
    setchain(e.target.value);
  };
|
最后,像这样渲染NftChainRadio上面的NftCardContainer组件:
1
2
3
|
<NftChainRadio handleSelectedChain={handleSelectedChain} />

<NftCardContainer searchResult={searchResult} loading={loading} />
|
现在,我们的 NFT 浏览器的外观和功能应如下所示:
![https://hicoldcat.oss-cn-hangzhou.aliyuncs.com/img/qD_zTUTPA.gif https://hicoldcat.oss-cn-hangzhou.aliyuncs.com/img/qD_zTUTPA.gif]()
您可以在此处找到本节 ( NftExplore.jsx)的完整代码要点。
构建主题切换组件
我们 NFT 浏览器应用程序中的下一个也是最后一个组件是ThemeSwitch组件。我们将使用它在 NFT 浏览器中切换深色和浅色主题。
在您的components文件夹中:
- 创建一个新
ThemeSwitch.jsx文件并粘贴以下代码:
 1
 2
 3
 4
 5
 6
 7
 8
 9
10
11
12
13
14
15
16
17
18
19
20
21
22
23
24
25
26
27
28
29
30
31
32
33
34
35
36
37
38
39
40
41
42
43
|
// components/ThemeSwitch.jsx
import React, { useEffect, useState } from "react";

export const ThemeSwitch = ({ settheme }) => {
  const [toggle, setToggle] = useState(true);
  const isDarkToggleClass = "transform translate-x-5 bg-gray-500";

  const handleToggle = () => {
    localStorage.setItem("isDark", !toggle);
    setToggle(!toggle);
    settheme(!toggle);
  };

  useEffect(() => {
    const isDark = JSON.parse(localStorage.getItem("isDark")) || true;

    if (isDark) {
      setToggle(true);
      settheme(true);
    } else {
      setToggle(false);
      settheme(false);
    }
  }, []);

  return (
    <React.Fragment>
      <section className='flex items-center mt-7'>
        <div
          className='mx-2 md:w-14 md:h-7 w-12 h-6 flex items-center bg-gray-400 rounded-full p-1 cursor-pointer'
          onClick={handleToggle}
        >
          <div
            className={
              "bg-gray-700 md:w-6 md:h-6 h-5 w-5 rounded-full shadow-md transform duration-300 ease-in-out" +
              (toggle ? isDarkToggleClass : null)
            }
          ></div>
        </div>
      </section>
    </React.Fragment>
  );
};
|
在上面的代码中,我们将用户的首选主题存储在他们的浏览器localStorage中,并使用步骤7的settheme更新App.js组件中的主题状态。这将导致在当前主题和其他主题之间的切换。
接下来,将NftExplore.jsx导入ThemeSwitch.jsx组件:
1
|
import { ThemeSwitch } from "../components/ThemeSwitch";
|
像下面这样在NftSearchBar.jsx组件下面渲染ThemeSwitch组件。
1
|
<ThemeSwitch settheme={settheme} />
|
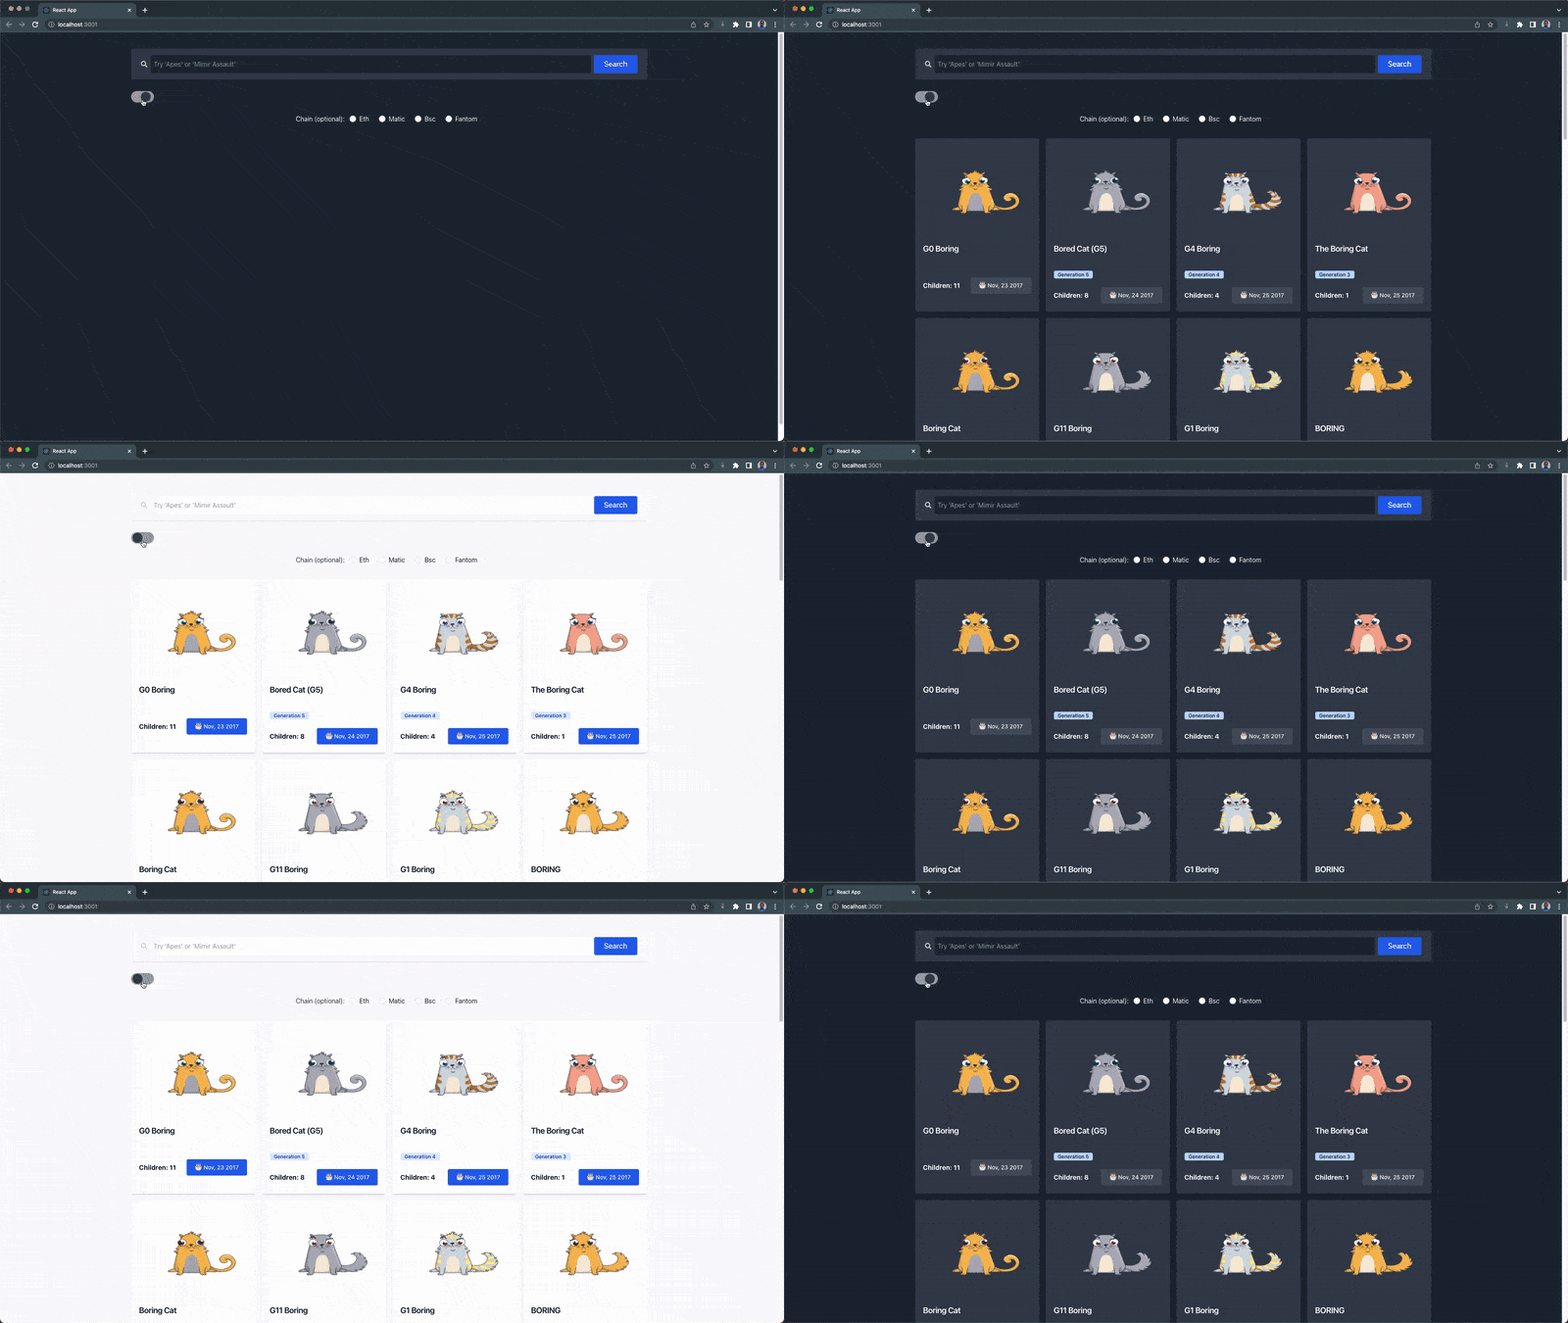
我们的主题切换组件应该像这样运行:
![https://hicoldcat.oss-cn-hangzhou.aliyuncs.com/img/mJCpvWa57.gif https://hicoldcat.oss-cn-hangzhou.aliyuncs.com/img/mJCpvWa57.gif]()
恭喜🎉🎉🎉
我们的 NFT 资源管理器已完全构建,下面是最终输出和功能的演示视频:
![https://hicoldcat.oss-cn-hangzhou.aliyuncs.com/img/WFt8uZi1z.gif https://hicoldcat.oss-cn-hangzhou.aliyuncs.com/img/WFt8uZi1z.gif]()
恭喜 👏 完成本教程,您可以在此处找到我们的 NFT Explorer 教程的完整源代码。
把它放在一起
这个 Moralis 构建允许您更快地创建 dApp,并通过提供 web3 NFT API 和 SDK 使您的 dApp 与多个区块链的交互更容易。
在本教程中,我们学习了如何设置 Moralis 云服务器并使用 Moralis React SDK 和 Moralis web3 NFT API。
![https://hicoldcat.oss-cn-hangzhou.aliyuncs.com/img/my.png https://hicoldcat.oss-cn-hangzhou.aliyuncs.com/img/my.png]()


