在本教程中,我们将使用 React、CSS 和 GunJs 创建一个去中心化的聊天应用程序。应该注意的是,您可以选择添加更多功能和样式。
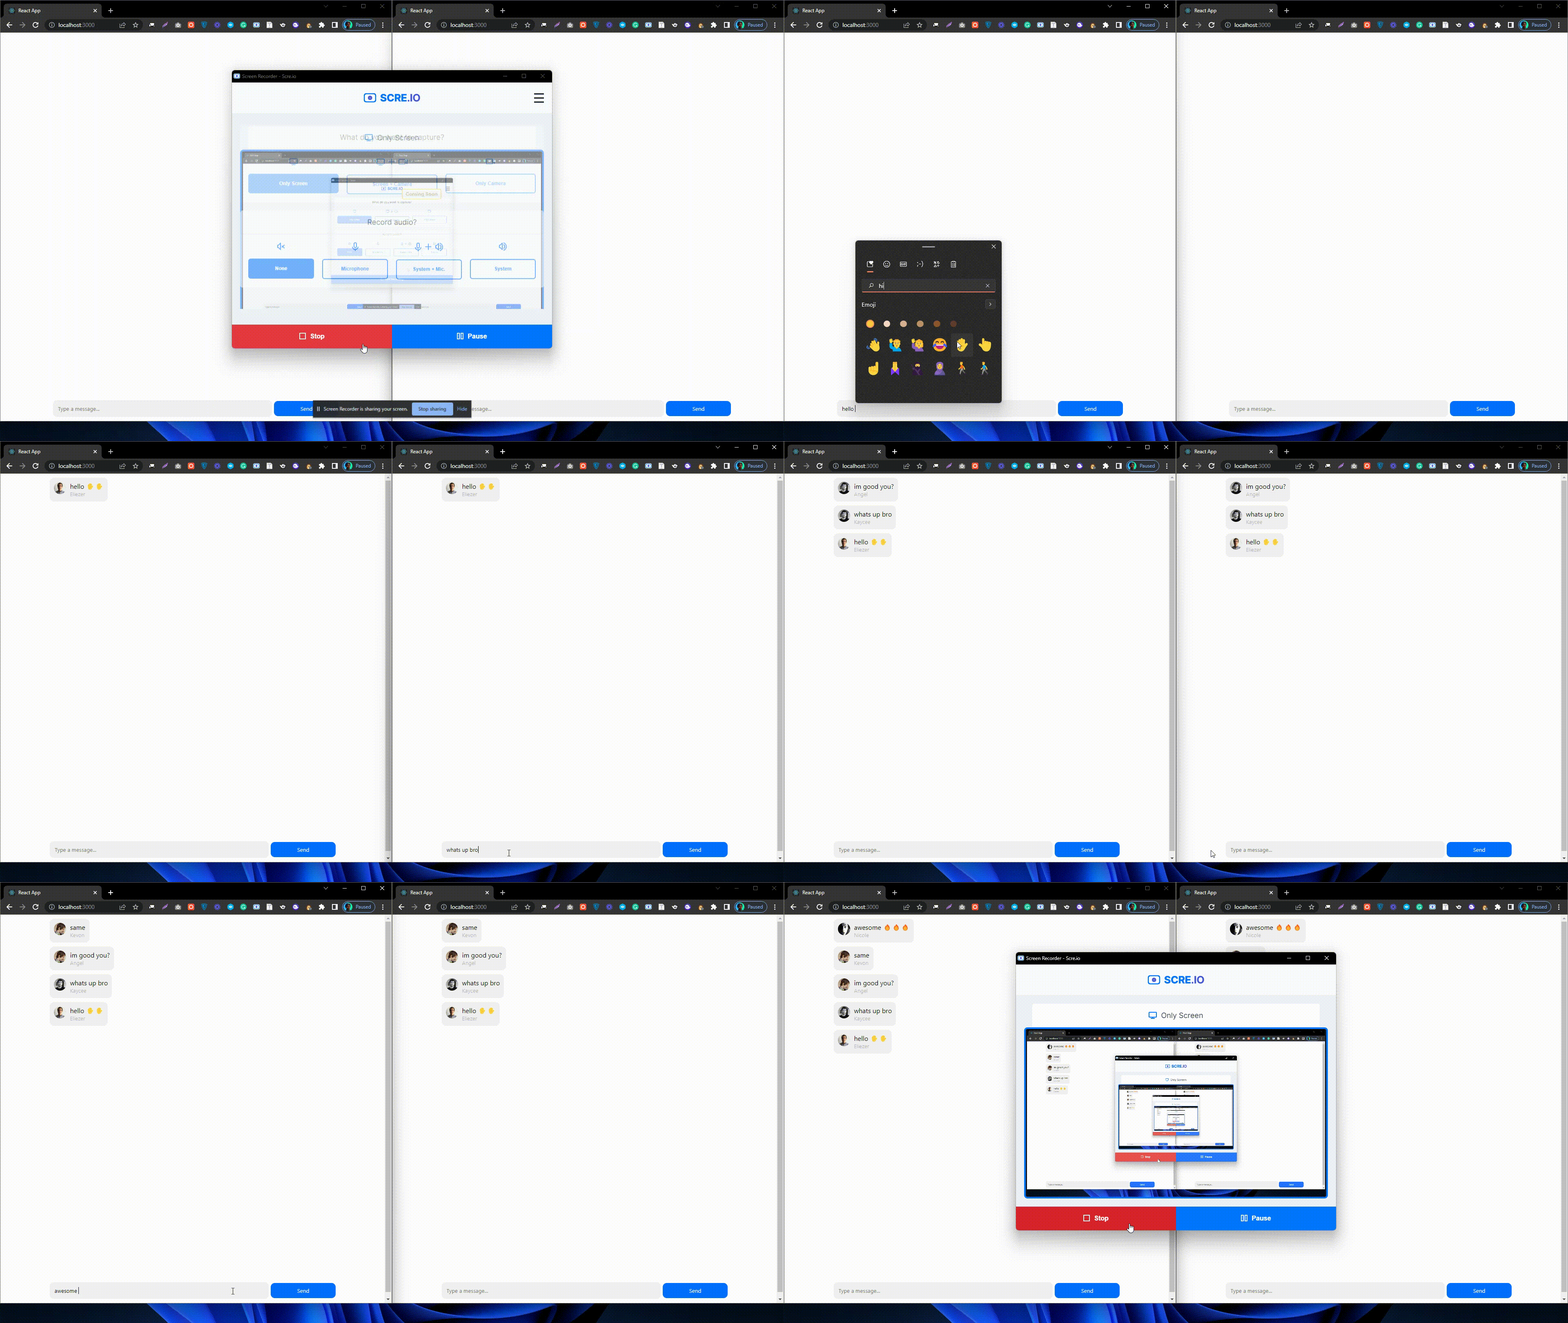
我们将构建类似的东西👇
![https://hicoldcat.oss-cn-hangzhou.aliyuncs.com/img/202209091823566.gif https://hicoldcat.oss-cn-hangzhou.aliyuncs.com/img/202209091823566.gif]()
为什么要使用去中心化聊天应用程序?
首先,让我们定义去中心化。
在去中心化系统中,数据不会存储在单个中心点或位置。相反,所述数据的副本被分发给多个参与者,这意味着没有单一的机构控制这些信息。
因此,基本上,去中心化消除了一个实体控制存储在中心位置的资产或特定资产的概念。
今天的一些消息平台可以读取我们的信息,如果它们没有进行端对端加密。我们有什么资格与那些声称安全的信息传递应用程序争论?从正面看,有些是高度安全的,我们的对话仍然是私密和安全的。
去中心化的聊天应用程序更安全,可以保护用户隐私。与某些标准消息传递平台相比,这为此类应用程序提供了显着优势。
我们的目标
在本文中,我们将使用 ReactJs 作为前端框架,使用 CSS 进行样式设置,GunJs用于去中心化。
GunJs允许我们在没有任何外部服务器或数据库的情况下存储数据。GunJS 是一个去中心化的数据库,它保存数据并将其分布在对等/计算机网络中。每台计算机都可能有完整或部分的实际数据。GunJs 数据库可以定义为存储在网络节点上的全部数据。
GunJs 不是自己编写程序来管理分散的信息存储系统,而是通过其简单的语法来简化它。
先决条件
![https://hicoldcat.oss-cn-hangzhou.aliyuncs.com/img/202209091823463.png https://hicoldcat.oss-cn-hangzhou.aliyuncs.com/img/202209091823463.png]()
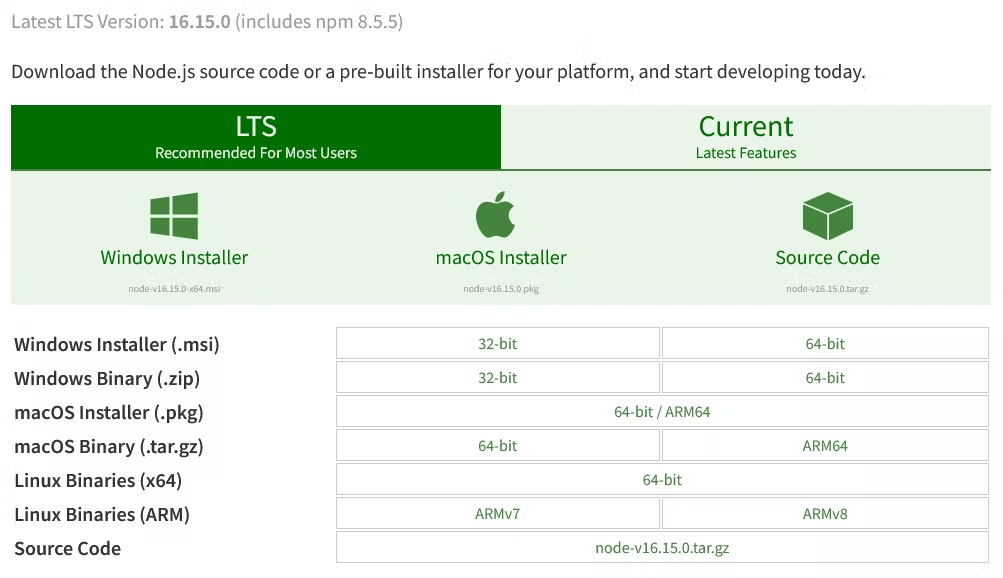
- create-react-app。这就是我们将用来创建我们的 React 应用程序的东西。您可以通过运行
npm i -g create-react-app或yarn add -g create-react-app在终端中安装它。
- 基本的 JavaScript 和 React 知识。
- 基本的 CSS 知识。
服务器
创建文件夹gun-server并初始化package.json文件:
1
2
3
|
mkdir gun-server
cd gun-server
npm init --y
|
我们需要服务器的express和gun。运行以下命令在我们的项目目录中安装包:
如果您正在使用npm,则应运行以下命令:
1
|
npm install gun express
|
创建服务器
在gun-server文件夹中,创建一个名为index.js. 该文件将包含服务器代码。它只需要大约 20 行代码:
 1
 2
 3
 4
 5
 6
 7
 8
 9
10
11
12
13
14
|
// in the index.js file

const express = require('express')
const app = express()
const port = 5050
const Gun = require('gun')

app.use(Gun.serve)

const server = app.listen(port, () => {
  console.log(`Gun server running on port ${port}🔥`)
})

Gun({ web: server })
|
前端
创建一个名为gun-client. 要创建应用程序,请在终端中运行以下代码:
1
2
3
|
npx create-react-app gun-client
cd gun-client
npm install gun @faker-js/faker
|
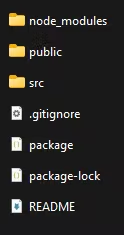
这应该会生成一个具有标准 React 样板代码和文件夹结构的 React 应用程序。您的项目文件夹应如下所示:
![https://hicoldcat.oss-cn-hangzhou.aliyuncs.com/img/202209091825273.png https://hicoldcat.oss-cn-hangzhou.aliyuncs.com/img/202209091825273.png]()
前端包
- GunJs
- Faker.js:这是一个 JavaScript 库,可以生成随机用户信息,例如名字、姓氏、个人资料图片等。作为发件人的用户名,我们将使用 Faker.js 生成一个随机用户名,该用户名将附加到每条消息. 启动应用程序时,您可以将此名称保存在本地或会话存储中,以确保每条消息具有相同的用户名。您还可以询问用户的姓名。
GunJs 配置
导入并初始化 Gun 库src/App.js和我们项目所需的 React hook:
 1
 2
 3
 4
 5
 6
 7
 8
 9
10
11
12
13
14
15
16
17
18
19
20
21
22
23
24
25
26
27
28
29
30
31
32
33
34
35
36
37
38
39
40
41
42
43
44
45
46
47
48
49
50
51
52
53
54
55
56
57
58
59
|
import './App.css'
import { useEffect, useState, useReducer } from 'react'
import Gun from 'gun'
import faker from '@faker-js/faker'

// Port 5050 is the port of the gun server we previously created
const gun = Gun({
  peers: [
    'http://localhost:5050/gun'
  ]
})

// The messages array will hold the chat messages
const currentState = {
  messages: []
}

// This reducer function will edit the messages array
const reducer = (state, message) => {
  return {
    messages: [message, ...state.messages]
  }
}

function App() {
  const [messageText, setMessageText] = useState('')
  const [state, dispatch] = useReducer(reducer, currentState)

  // fires immediately the page loads
  useEffect(() => {

  }, [])

  // save message to gun / send message
  const sendMessage = () => { }

  return <div className="App">
    <main>
      <div className='messages'>
        <ul>
          <li className='message'>
            <img alt='avatar' src='https://res.cloudinary.com/follio/image/upload/v1650729202/vhophm5tpnlyaj2h6snf.png' />
            <div>
              Hey there y'all 👋
              <span>Langford</span>
            </div>
          </li>
        </ul>
      </div>
      <div className='input-box'>
        <input placeholder='Type a message...' />
        <button>Send</button>
      </div>
    </main>
  </div>
}

export default App
|
样式设计
你可以尽情发挥创意并引入尽可能多的样式,但为了简单起见,我们在本教程中使用基本的 CSS 样式。打开src/index.css文件以设置应用程序样式并复制以下代码:
 1
 2
 3
 4
 5
 6
 7
 8
 9
10
11
12
13
14
15
16
17
18
19
20
21
22
23
24
25
26
27
28
29
30
31
32
33
34
35
36
37
38
39
40
41
42
43
44
45
46
47
48
49
50
51
52
53
54
55
56
57
58
59
60
61
62
63
64
65
66
67
68
69
70
71
72
73
74
75
76
77
78
79
80
81
82
|
* {
  padding: 0;
  margin: 0;
  list-style-type: none;
  font-family: -apple-system, BlinkMacSystemFont, 'Segoe UI', Roboto, Oxygen, Ubuntu, Cantarell, 'Open Sans', 'Helvetica Neue', sans-serif
}

main {
  max-width: 700px;
  margin: auto;
  height: 100vh;
}

.input-box {
  display: flex;
  align-items: center;
  position: fixed;
  bottom: 0;
  padding: 10px 0;
  width: 100%;
  max-width: 700px;
}

input {
  width: 100%;
  border: 2px solid #f1f1f1;
  padding: 10px;
  background: #f1f1f1;
  outline: none;
  border-radius: 10px;
}

button {
  padding: 10px;
  width: 30%;
  border: none;
  background: #016fff;
  border-radius: 10px;
  margin-left: 5px;
  color: #fff;
  cursor: pointer;
}

button:hover {
  opacity: .5;
}

.message {
  background: #f1f1f1;
  margin: 10px 3px;
  margin-left: 0;
  border-radius: 10px;
  padding: 10px;
  text-align: left;
  width: max-content;
  display: flex;
}

.messages>ul {
  padding-bottom: 100px;
}

.message>img {
  background: #fff;
  width: 30px;
  height: 30px;
  object-fit: contain;
  border-radius: 9999px;
  margin-right: 10px;
}

.message>div span {
  opacity: .3;
  display: block;
  font-size: small;
}

.message>div {
  display: flex;
  flex-direction: column;
}
|
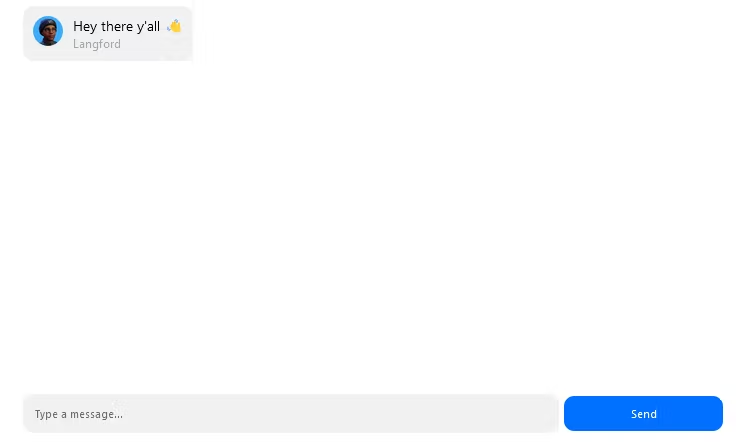
当您在浏览器中查看应用程序时,您应该会看到如下内容:
![https://hicoldcat.oss-cn-hangzhou.aliyuncs.com/img/202209091826382.png https://hicoldcat.oss-cn-hangzhou.aliyuncs.com/img/202209091826382.png]()
处理用户交互
在useEffect钩子中,添加以下代码:
 1
 2
 3
 4
 5
 6
 7
 8
 9
10
11
12
|
useEffect(() => {
    const messagesRef = gun.get('MESSAGES')
    messagesRef.map().on(m => {
      dispatch({
        name: m.name,
        avatar: m.avatar,
        content: m.content,
        timestamp: m.timestamp
      })
    })
  }, [])
|
页面加载后,挂钩中的任何代码useEffect都会立即执行。在我们的例子中,我们希望在页面加载后立即检索消息。然后,我们将它保存到我们的消息数组中并在前端显示。
将前端 JSX 代码替换为以下代码:
 1
 2
 3
 4
 5
 6
 7
 8
 9
10
11
12
13
14
15
16
17
18
19
20
21
|
return <div className="App">
    <main>
      <div className='messages'>
        <ul>
          {state.messages.map((msg, index) => [
            <li key={index} className='message'>
              <img alt='avatar' src={msg.avatar} />
              <div>
                {msg.content}
                <span>{msg.sender}</span>
              </div>
            </li>
          ])}
        </ul>
      </div>
      <div className='input-box'>
        <input placeholder='Type a message...' onChange={e => setMessageText(e.target.value)} value={messageText} />
        <button onClick={sendMessage}>Send</button>
      </div>
    </main>
  </div>
|
在 input-box中,我们添加了一个事件来跟踪用户输入,并在sendMessage单击“发送”按钮时执行该功能。
此外,在ul 中,我们循环并渲染了state.messages数组变量中的消息。
发送消息
在我们可以发送消息之前,我们必须首先参考聊天键,在这种情况下是MESSAGES. 此键代表当前聊天室,并充当此房间的唯一标识符。您可以生成唯一的密钥/ID 来实现一对一的聊天功能。
将此聊天键视为包含我们所有消息的存储桶的名称。您还可以将聊天室视为包含不同消息集的单独存储桶。
在sendMessage函数中,复制以下代码:
 1
 2
 3
 4
 5
 6
 7
 8
 9
10
11
12
13
14
15
16
17
18
19
|
 const sendMessage = () => {
       // a reference to the current room
        const messagesRef = gun.get('MESSAGES')

       // the message object to be sent/saved
        const messageObject = {
            sender: faker.name.firstName(),
            avatar: faker.image.avatar(),
            content: messageText,
            timestamp: Date().substring(16, 21)
        }

        // this function sends/saves the message onto the network
        messagesRef.set(messageObject)

       // clear the text field after message has been sent
        setMessageText('')
    }
|
一个严重的错误修复🐛
我们的聊天应用程序现在可以运行了,但默认情况下,发送的每条消息可能会出现多次。我们将创建一个函数 ,newMessagesArray, 它遍历消息数组,删除重复的消息,并返回一个新数组来解决这个问题:
 1
 2
 3
 4
 5
 6
 7
 8
 9
10
11
12
13
14
15
|
  // remove duplicate messages
  const newMessagesArray = () => {
    const formattedMessages = state.messages.filter((value, index) => {
      const _value = JSON.stringify(value)
      return (
        index ===
        state.messages.findIndex(obj => {
          return JSON.stringify(obj) === _value
        })
      )
    })

    return formattedMessages
  }
|
最终代码
我们已经使用 React 和 GunJs 构建了我们自己的去中心化聊天应用程序。这是src/App.js的最终代码:
  1
  2
  3
  4
  5
  6
  7
  8
  9
 10
 11
 12
 13
 14
 15
 16
 17
 18
 19
 20
 21
 22
 23
 24
 25
 26
 27
 28
 29
 30
 31
 32
 33
 34
 35
 36
 37
 38
 39
 40
 41
 42
 43
 44
 45
 46
 47
 48
 49
 50
 51
 52
 53
 54
 55
 56
 57
 58
 59
 60
 61
 62
 63
 64
 65
 66
 67
 68
 69
 70
 71
 72
 73
 74
 75
 76
 77
 78
 79
 80
 81
 82
 83
 84
 85
 86
 87
 88
 89
 90
 91
 92
 93
 94
 95
 96
 97
 98
 99
100
101
|
import './App.css'
import { useEffect, useState, useReducer } from 'react'
import Gun from 'gun'
import faker from '@faker-js/faker'

// Port 5050 is the port of the gun server we previously created
const gun = Gun({
  peers: [
    'http://localhost:5050/gun'
  ]
})

// The messages array will hold the chat messages
const currentState = {
  messages: []
}

// This reducer function will edit the messages array
const reducer = (state, message) => {
  return {
    messages: [message, ...state.messages]
  }
}

function App() {
  const [messageText, setMessageText] = useState('')
  const [state, dispatch] = useReducer(reducer, currentState)

  // fires immediately the page loads
  useEffect(() => {
    const messagesRef = gun.get('MESSAGES')
    messagesRef.map().on(m => {
      dispatch({
        sender: m.sender,
        avatar: m.avatar,
        content: m.content,
        timestamp: m.timestamp
      })
    })
  }, [])

  // remove duplicate messages
  const newMessagesArray = () => {
    const formattedMessages = state.messages.filter((value, index) => {
      const _value = JSON.stringify(value)
      return (
        index ===
        state.messages.findIndex(obj => {
          return JSON.stringify(obj) === _value
        })
      )
    })

    return formattedMessages
  }

  // save message to gun / send message
  const sendMessage = () => {
    // a reference to the current room
    const messagesRef = gun.get('MESSAGES')

    // the message object to be sent/saved
    const messageObject = {
      sender: faker.name.firstName(),
      avatar: faker.image.avatar(),
      content: messageText,
      timestamp: Date().substring(16, 21)
    }

    // this function sends/saves the message onto the network
    messagesRef.set(messageObject)

    // clear the text field after message has been sent
    setMessageText('')
  }


  return <div className="App">
    <main>
      <div className='messages'>
        <ul>
          {newMessagesArray().map((msg, index) => [
            <li key={index} className='message'>
              <img alt='avatar' src={msg.avatar} />
              <div>
                {msg.content}
                <span>{msg.sender}</span>
              </div>
            </li>
          ])}
        </ul>
      </div>
      <div className='input-box'>
        <input placeholder='Type a message...' onChange={e => setMessageText(e.target.value)} value={messageText} />
        <button onClick={sendMessage}>Send</button>
      </div>
    </main>
  </div>
}

export default App
|
当您返回http://localhost:3000/首选浏览器时,您应该会看到如下内容:
![https://hicoldcat.oss-cn-hangzhou.aliyuncs.com/img/202209091823566.gif https://hicoldcat.oss-cn-hangzhou.aliyuncs.com/img/202209091823566.gif]()
您可以在Heroku或任何其他服务器托管平台上托管服务器。
您还可以在Vercel或其他一些 React 托管平台上托管您的 React 前端。
![https://hicoldcat.oss-cn-hangzhou.aliyuncs.com/img/my.png https://hicoldcat.oss-cn-hangzhou.aliyuncs.com/img/my.png]()


